So you’re building the perfect website in Shopify for your business, and everything is on brand, until you get to the fonts. There are only a handful of web-safe fonts that are natively displayed in web browsers by default. Only twenty in fact. The following are fonts you can use with your website without having to use CSS:
Web-safe Fonts
- Verdana (sans-serif)
- Arial (sans-serif)
- Arial Black (sans-serif)
- Helvetica (sans-serif)
- Tahoma (sans-serif)
- Trebuchet MS (sans-serif)
- Impact (sans-serif)
- Gill Sans (sans-serif)
- Times New Roman (serif)
- Georgia (serif)
- Palatino (serif)
- Baskerville (serif)
- Andalé Mono (monospace)
- Courier (monospace)
- Lucida (monospace)
- Monaco (monospace)
- Bradley Hand (cursive)
- Brush Script MT (cursive)
- Luminari (fantasy)
- Comic Sans MS (cursive)
Whilst Comic Sans might suit some people; it’s not the choice for most businesses.
If your brand uses a specific font for your logo and marketing materials, you might have to implement some CSS.
What is CSS?
CSS stands for Cascading Style Sheets. To put it simply, CSS is used to control the look and style of websites. It’s a list of rules that states which colours, sizes and fonts are to be used throughout the website. Prior to CSS, if you wanted to change the heading size on all of your pages, you would have to edit each one individually. This was a time-consuming process. But since CSS was implemented, you only have to change one line of code to update the look of the entire site. This means that we can apply a new font site-wide by just specifying what font to use, and what to use it on.
What type of fonts can I use with CSS?
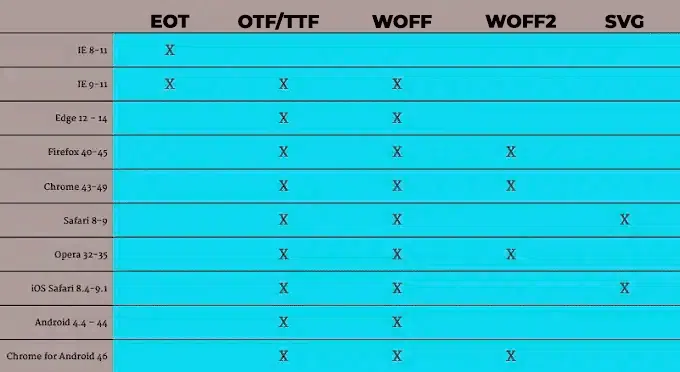
There are a few font formats that can be used with CSS. Some browsers only support some of the formats, so it’s crucial that you include multiple font file formats in your CSS. For example, if you only used WOFF2 fonts, you might find they don’t render correctly on older browsers like Internet Explorer. The formats you’ll need to make sure that you site looks great across all browsers are; TTF, OTF, WOFF, WOFF2 and EOT. SVG can also be used, but is not yet widely supported.
How to create OTF, WOFF, WOFF2 and SVG Fonts
Adding a custom font to your website is reasonably straightforward. The first step is to make sure that you have your font in the formats required. A great free tool to accomplish that is Transfonter. This will allow you to upload your custom font and it will convert it into your selected formats. This tool will also pre-generate the needed CSS for you to setup your font.
How to add custom fonts to Shopify
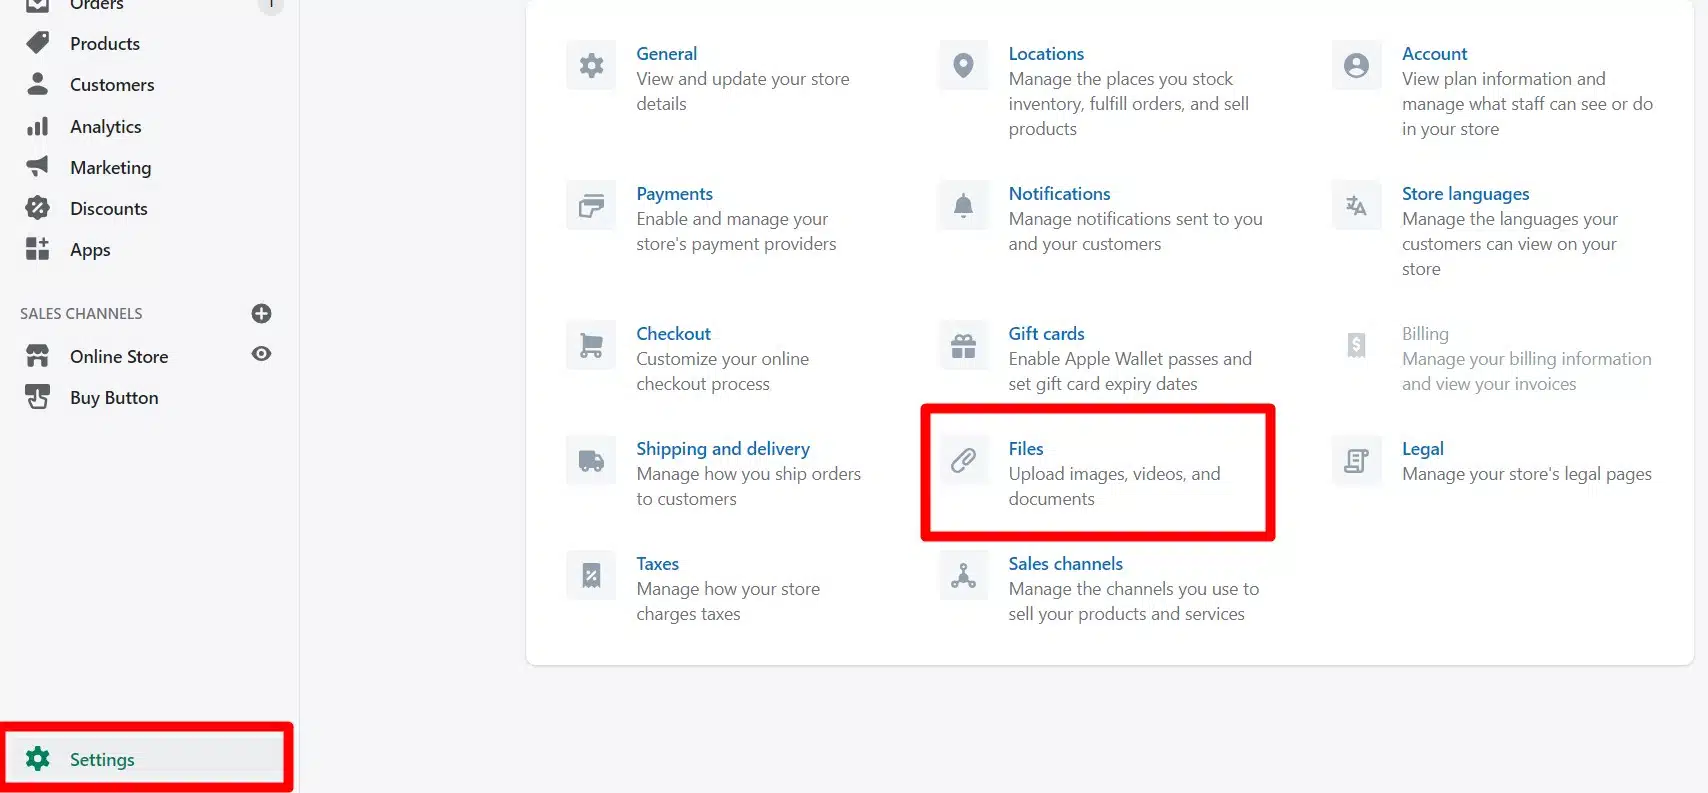
Now that you have your custom font in multiple web-safe formats, you will need to upload these new fonts to your site. An easy way to do this is from your admin panel is by going to Settings, Files.
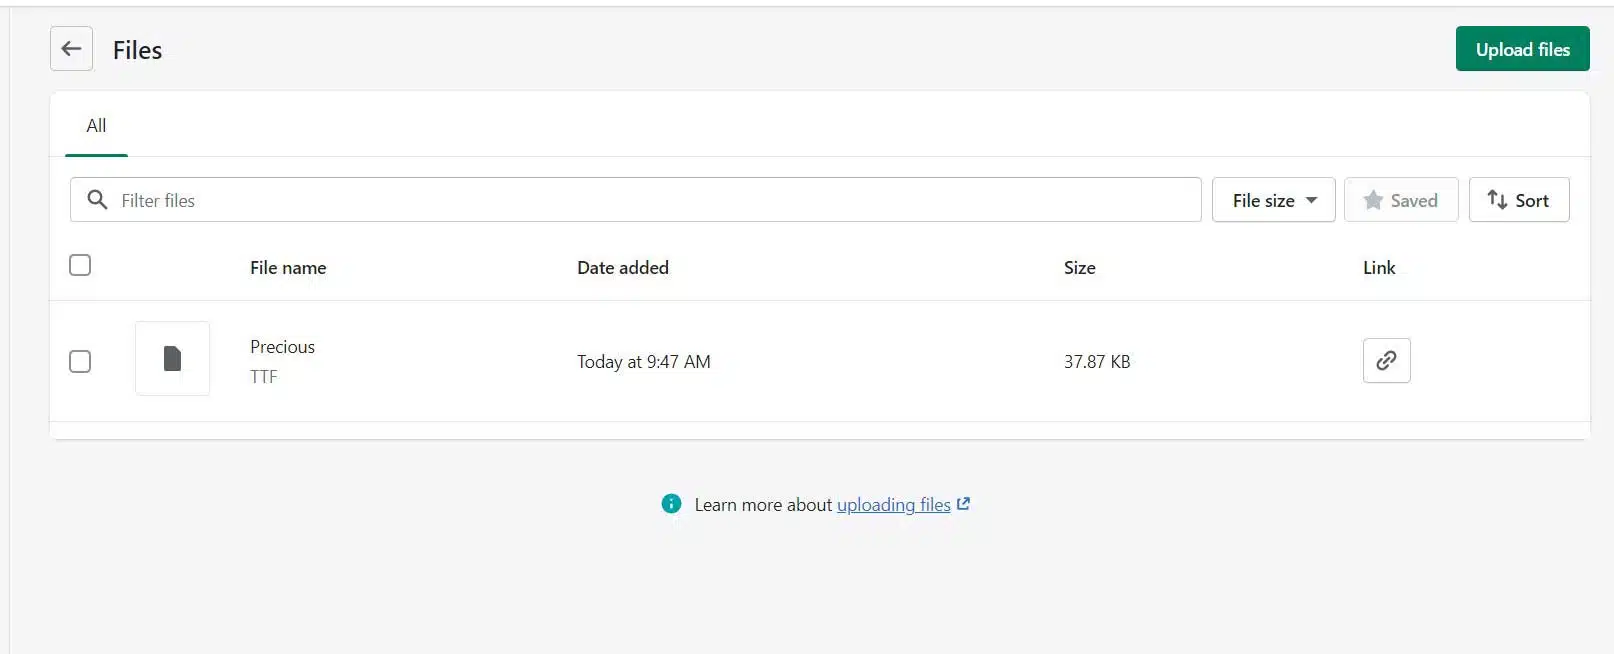
From there, you can upload each font format. After you upload the font you will see a link icon on the right. Press this to copy the direct URL to that font file. Keep note of these, as they will be used to link the fonts to the CSS.
Adding a Custom Font to CSS
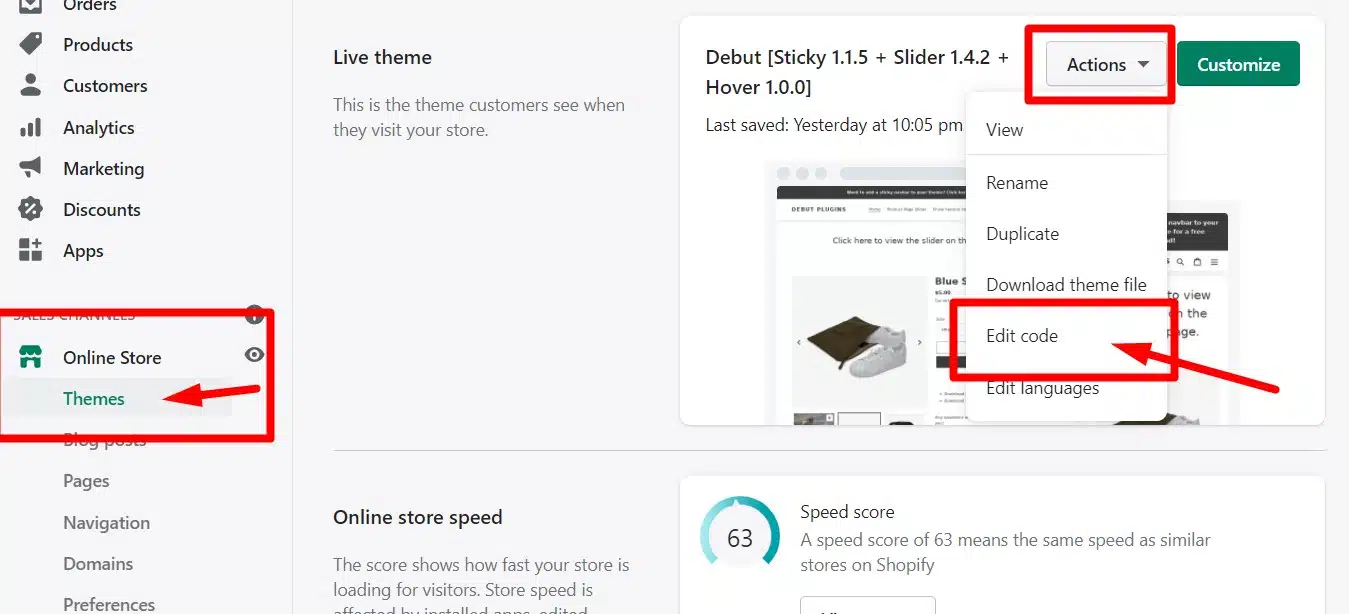
Now we have to add the font to the theme’s CSS. For Shopify, in your Admin panel, navigate to Online Store > Themes > Actions > Edit Code.
Search your theme files for theme.css.
At the bottom of this file, you will add the style that declares a new font family and the location of the font files. Remember copying the links to the font files you uploaded to Shopify? These are the URLs you will need here.
Copy and paste the following code onto the bottom of your Theme’s CSS file. Change the font-family name to the name of your font, and update the URLs to the ones you copied earlier for each format.
  @font-face {
  font-family: "yourfontname";
  src: url('https://cdn.shopify.com/s/files/1/0463/4650/333/files/yourfont.eot?v=1669674271') format("embedded-opentype"),
       url('https://cdn.shopify.com/s/files/1/0463/4650/333/files/yourfont.woff?v=1339674271') format("woff"),
       url('https://cdn.shopify.com/s/files/1/0463/4650/333/files/yourfont.woff2?v=1669443271') format("woff2"),
       url('https://cdn.shopify.com/s/files/1/0463/4650/333/files/yourfont.ttf?v=1669674271') format("truetype"),
       url('https://cdn.shopify.com/s/files/1/0463/4650/333/files/yourfont.svg?v=1669674271') format("svg");
   }
Once this has been added to the CSS, click Save. You have now successfully uploaded and installed a new font on your site.
Now, to display it.
The following style will apply your font to your selected elements. If we wanted to apply the new font family to all Headings, we would use the following at the bottom of your theme’s CSS. (Change Yourfontname to the name of your font family)
h1,h2,h3,h4,h5,h6 {
font-family: "Yourfontname" !important;
}
We use !important to tell the CSS to override any other CSS rules that might already exist for the same elements.
For another example, let’s just apply the new font to the main headings (H1).
h1 {
font-family: "Yourfontname" !important;
}
If you want to apply your font to other elements besides headings, inspect the page source and look for the element class.
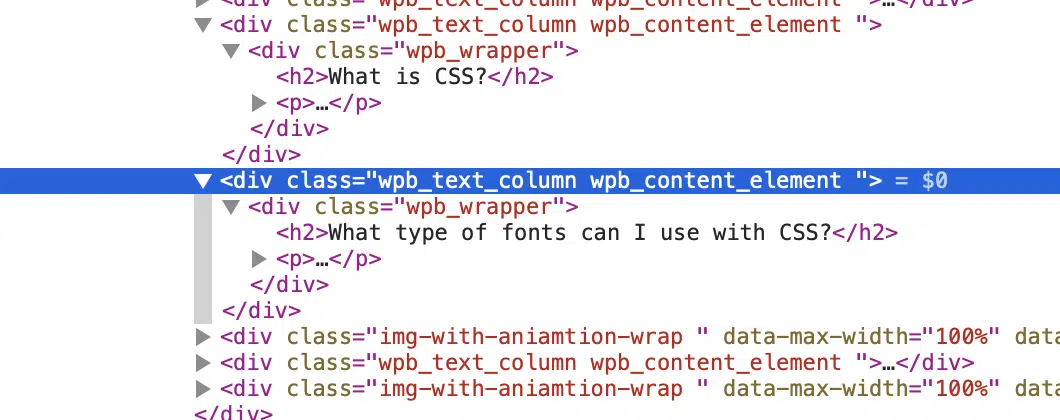
For this highlighted line we can see class=”wpb_text_column”. To apply our new font to this class we would use the following:
.wpb_text_column {font-family: "Yourfontname" !important;}
Conclusion
By following this guide, you have learnt what font formats are web safe, how to create new font formats, how to upload fonts to Shopify and how to add them into CSS. I hope that you have found this information useful. If you need any help with web design or building Shopify Websites, feel free to contact us.